NickerStickers Decals are Easy to Apply!Whether you've never, ever applied a decal before or are an old pro, NickerStickers go on smooth and easy and stick very well.
Before you start, WASH THE SURFACE!Don't Use Window Cleaner!
We recommend you use plain old soap and water, 1/3 cup soap to 1 cup water. If there is any wax build up, use a scrubby. Finish with a lint free cloth to dry. You can add additional touch of extra cleaning with rubbing alcohol, mixed half and half with water. But soap and water is usually good enough.
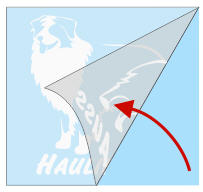
Step 1. Peel the transfer tape with the decal stuck to it away from the waxy backing paper. The adhesive side of your decal is now exposed. Be careful! Don't get it dirty and don't touch it with your fingers. Use the clear transfer tape to hold because you'll be taking that off later anyway.

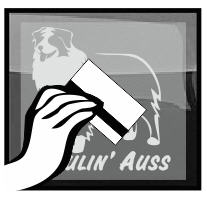
Step 2. Using the transfer tape, roll your decal on to the surface to which you are applying, starting at one corner and laying it down. Once it is on the surface, rub on top of the clear transfer tape and decal using a credit card and working from the center out. Press lightly at first, then repeat more firmly. Repeat several times.

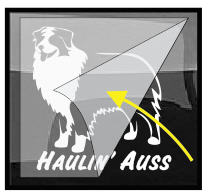
Step 3. REMOVE THE TRANSFER TAPE. The decal is under the transfer tape. Pull the transfer tape up at a sharp angle beginning at one corner. Remove the clear tape on top of the decal and throw it away. Your decal should easily stick to the surface while you are pulling up the transfer tape. If it's not sticking solid, try leaving it on overnight and taking it off the next day.

For more information on decal application, including applying large decals,
video instruction, and trouble shooting, click here:

Customize Your Decal! How Does It Work?Each custom decal is designed by one of our in-house artists. We don't use automated systems to generate the design, so you won't see the custom design automatically. You can either choose to pre-approve the design, or choose the "I Trust You" option to have our artists design and ship it right away without waiting for approval. If you are a returning customer that is re-ordering a design you have already approved, choose the option "Copy of Previous Design" and our artists will look for it in our archives. It normally takes 24 hours for our artist to create the custom designs and either ship or reply to you.
Step 1. Find the species and/or breed you want and then locate the product that has the word "Custom" in the title.

Step 2. Next, choose the options to customize the size, color, direction and text. You can leave the text blank if you wish to have just the animal with no text added.

Step. 3 Your decal will be designed by our artists when they see the options you have chosen on your order. If you chose to pre-approve your design, a picture of the design will be emailed to you. Be sure to allow our email,
[email protected], in your email server so that your pre-approval email does not go to spam!
Your custom decal pre-approval request photo will include a picture of the design exactly how it will look when applied, including the size and color.

Changes to My Custom DecalYou can request changes to your design, such as a different font, and our artists will change the design and send another pre-approval email. If you choose to request pre-approval, but do not reply to approve your design after 10 days have passed, we will ship your decal without pre-approval. Custom decals are not refundable, so be sure it is exactly as you wish and be sure our email (
[email protected]) is on your email server's approved email list.